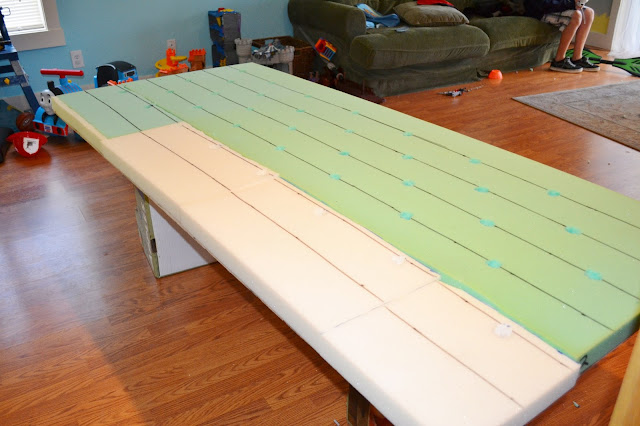
I found a great tutorial on Addicted 2 Decorating, and yep, it was a lot of work but not complicated. I cut my bed budget by half so I felt it was worth it. Kristi, the tutorial lady, made a king sized bed so I just used all her measurements. You can check out her great tutorial {HERE.}
 |
| Hers |
 |
| Mine |
I just followed the tutorial by laying quilt batting on top of the foam, then laid down my navy linen and sweetly asked Aaron to help nail-gun the buttons in place.
I hung the head board on the wall with this things-ma-jingy, making sure to screw at least two screws into the studs. And it works perfectly.
Just taped it off and applied some of my good ol' Buff 'N Rub. It's the same thing I did on the hardware of our nightstands and the bases of our IKEA lamps.
Silver to gold. Easy.
I was also looking for a small table to put next to our great reading chair. I knew I wanted something like this....

But everything I looked at ranged from $90-$175 and everywhere in between. More than what I wanted to spend,. Then TJ Maxx sweeps in with a sweet find.. Rummaging through their clearance section I find this beauty for $39.95.
I had originally wanted it white, (I know, enough with the white) but with everything else being white, I knew I wanted to bring in a different color, So I chose the navy blue. Primed it with the grey and then gave a good 6-7 coats of the blue.
Not sure how I like the blue but both Aaron and Lucas said they like it, so it stays.
I sewed the curtains. Even lined them with black out fabric. Love it! Now I need to get some up in Jonah's room so he's not getting up at the crack of dawn.
.
.
.
.Ok, blog has decided not to load any more pictures tonight. Ok, well. You know what the curtains look like.
I'll have to add the two slipcovers I went through trying to find a decent "coral" color. Ended up being too much color for my taste.
Anyway, I'm tired. My bed is calling.


Bea-u-tiful! You always do such great before and afters and absolutely love love love the bed! Great job!
ReplyDeleteYou are seriously the most creative person I know. All of those projects look amazing. I have that same IKEA lamp and you've inspired me to snazz it up. Also, once you go foam you never go back - best decision ever!
ReplyDeleteyou are so amazing!
ReplyDeleteA-MAZING. I felt tired just looking at the pictures of the headboard process. But it turned out beautifully!
ReplyDelete